 Book demo
 Book demo
1st July 2020
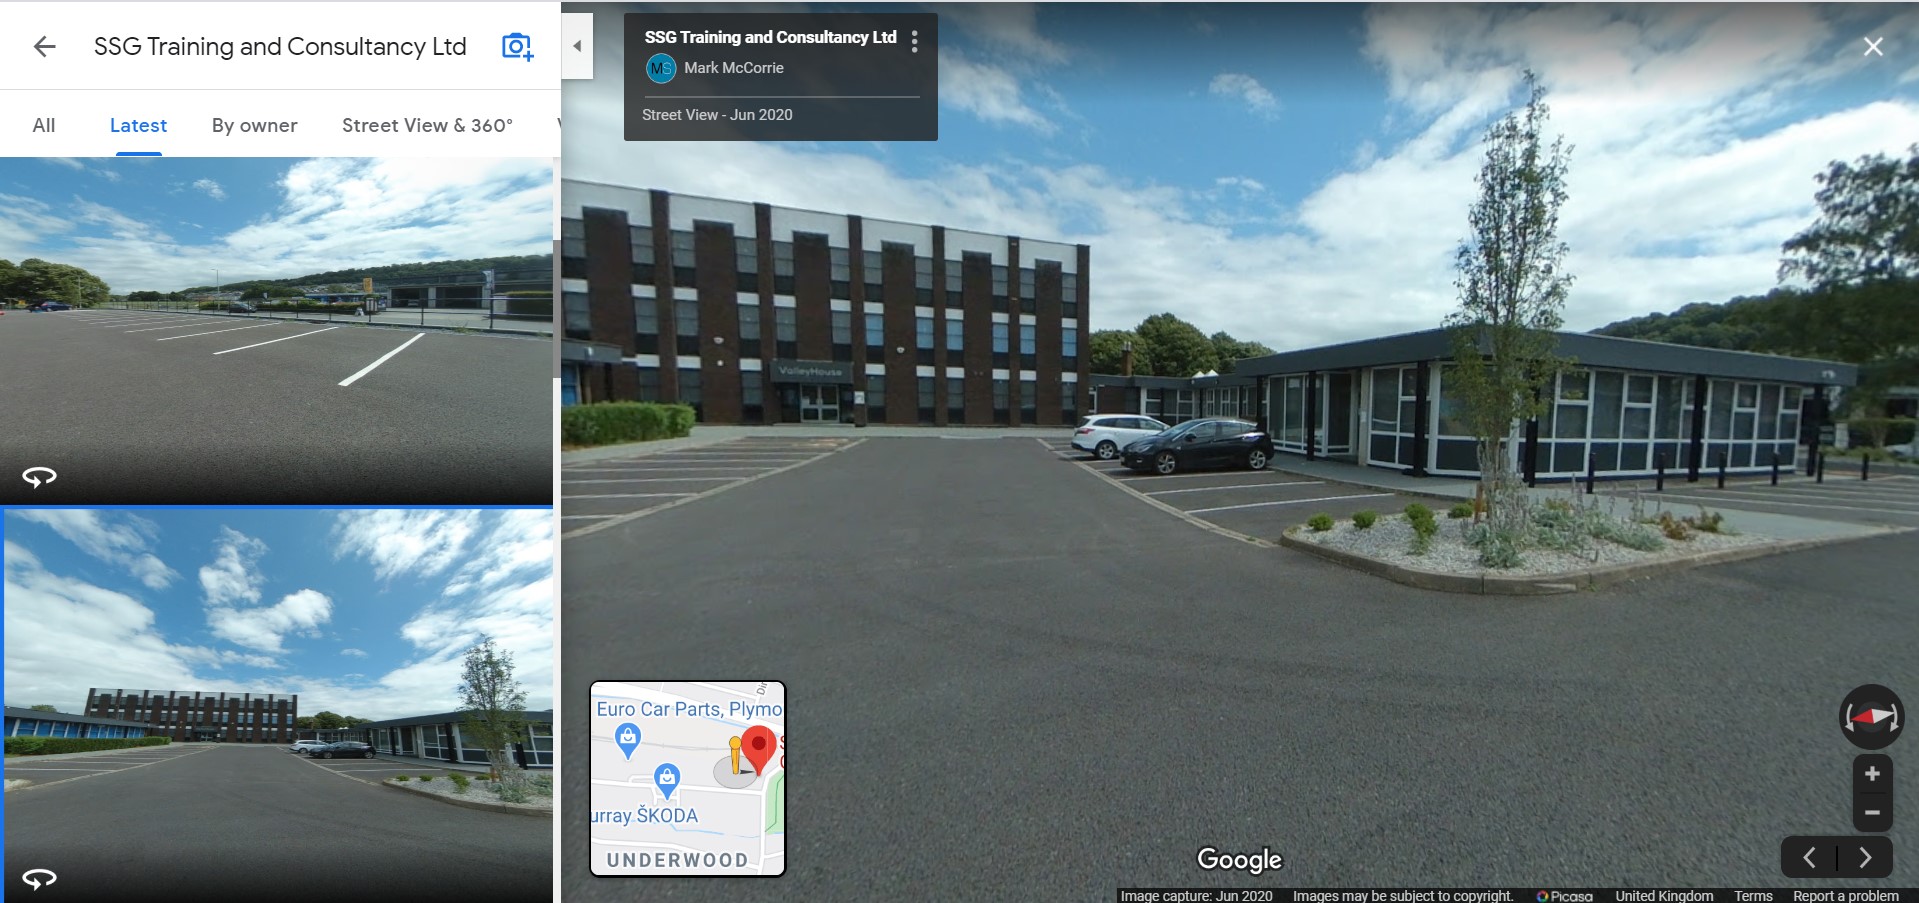
Your 360 photographs can be added to Google street view. Similar to creating a virtual tour, you upload the images and link them together, allowing a viewer to walk around an area.
Uses of Google street view may include providing alternative views of small lanes and narrow spaces, show a tour of your office or walking around an outdoor space such as a car park.
We recommend both reading through our step-by-step guide, and watching the video tutorial located at the bottom of the page.
It is often thought only specialists can upload virtual tours to Google, often costing £100's. If you already have a 360 camera, then you can upload the images in to Google Street View yourself and turn them in to a tour in around 30 minutes.
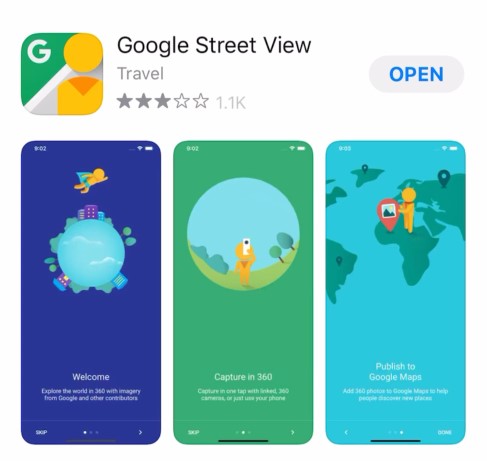
Open up the app store on your mobile device and download the Google Street View app.
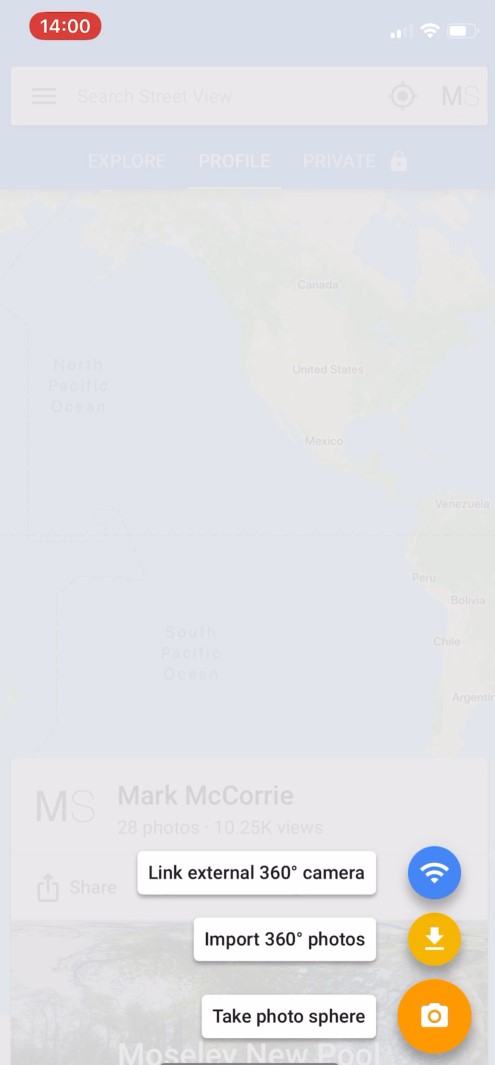
In the bottom right corner, click the upload icon and select 'Import 360 photos'. Select the images from your camera roll and click publish. The images will then upload in to Google.

Now your images are in Google, you need to link them to a location to ensure they are in the correct place.
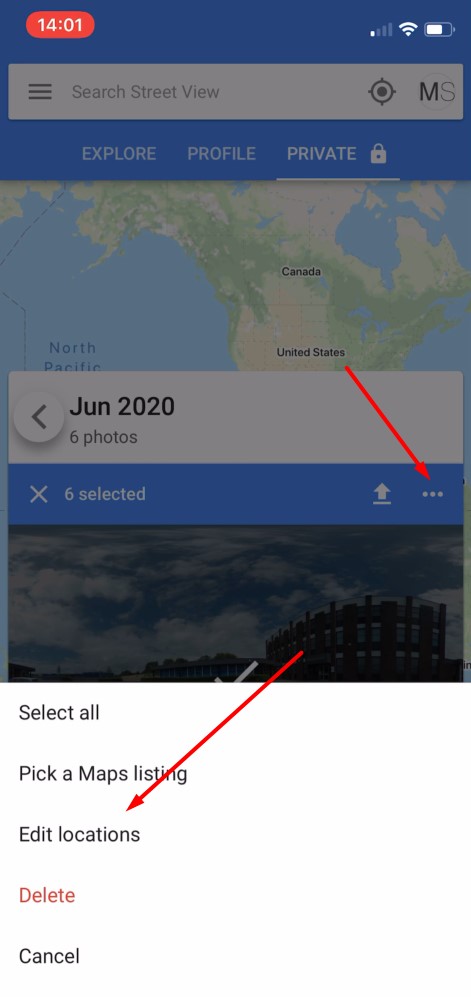
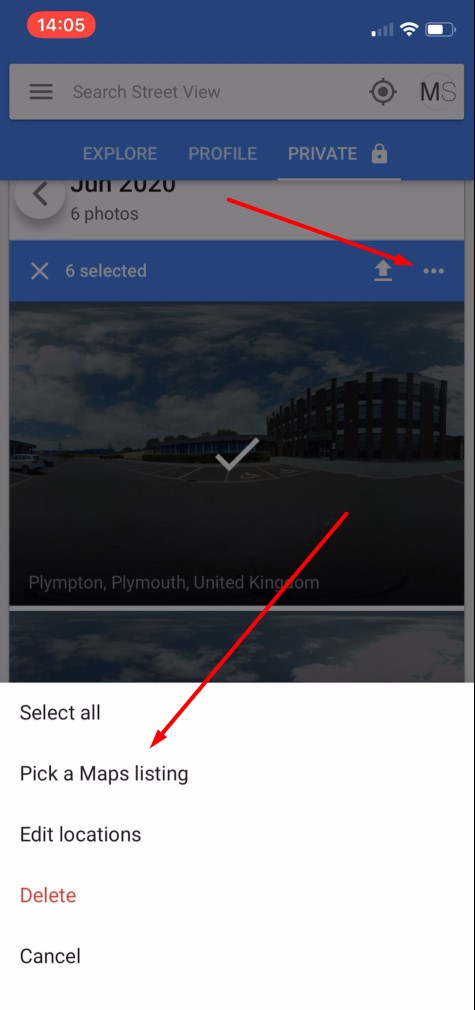
Select all of the images you have uploaded and click the toggle on the right to bring up the menu. From here, click 'Edit locations'.
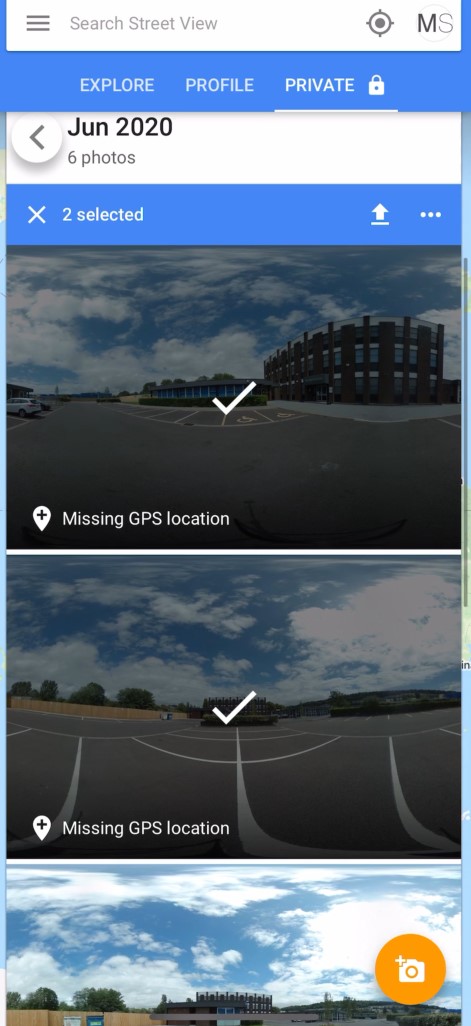
Go through the images one by one, placing them in the correct locations and facing the right direction, as you would be stood if you opened the 360.
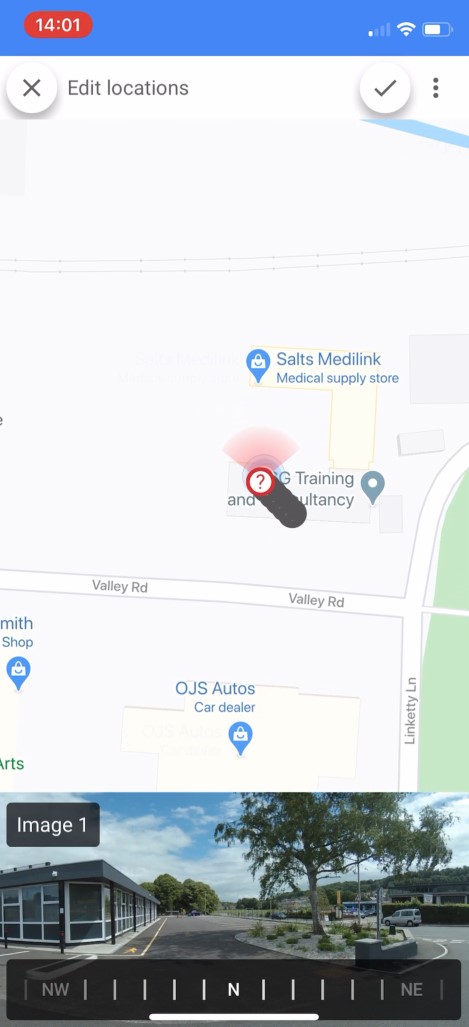
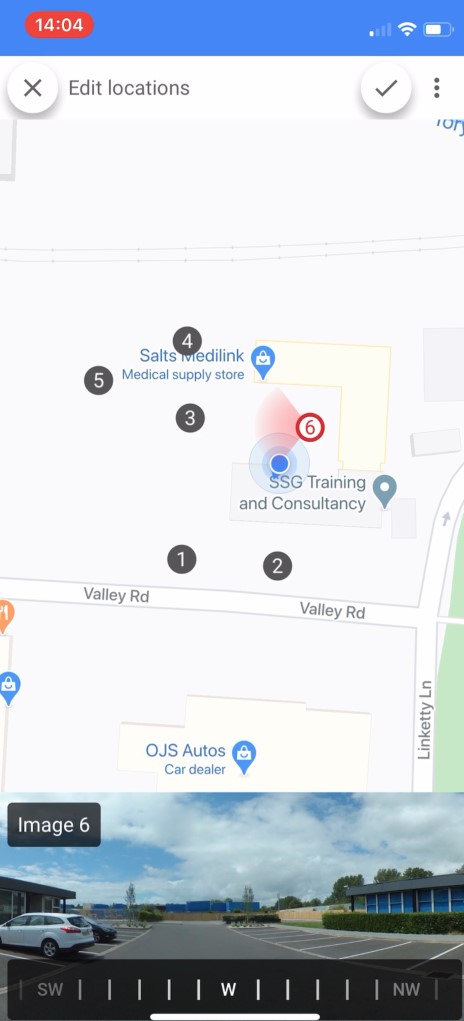
Once you have placed all of the images, click the tick in the top left corner to save.
Once you have saved the locations, click on the toggle again and select 'Pick a maps listing'. Type in your business name and it will bring up your Google Business listing. Select the appropriate listing.
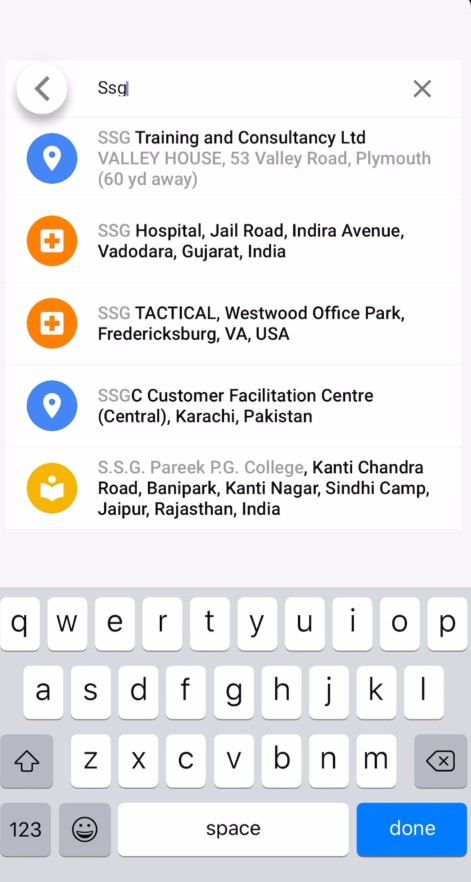
Click the publish button and the business will become tied to your images.
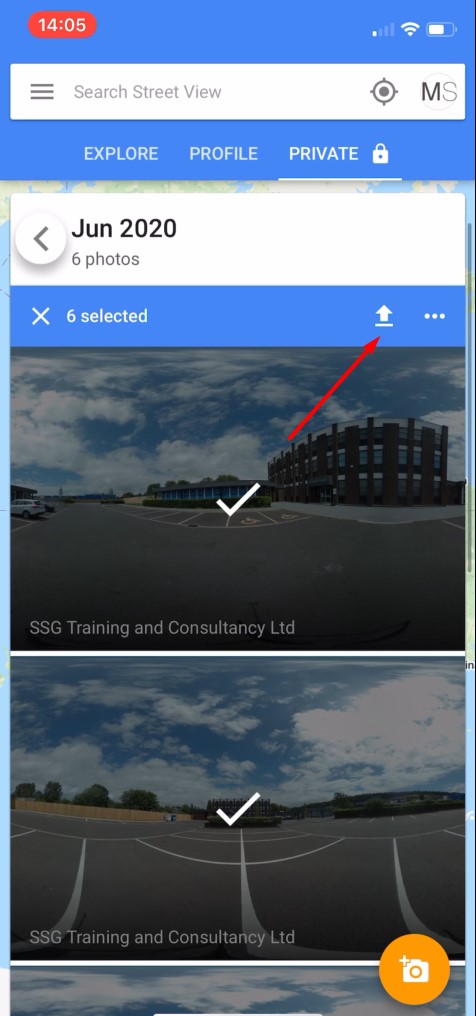
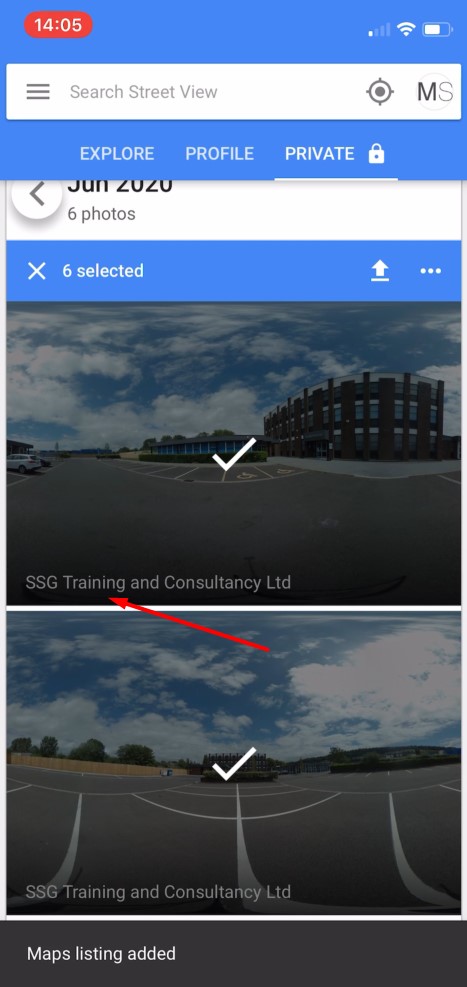
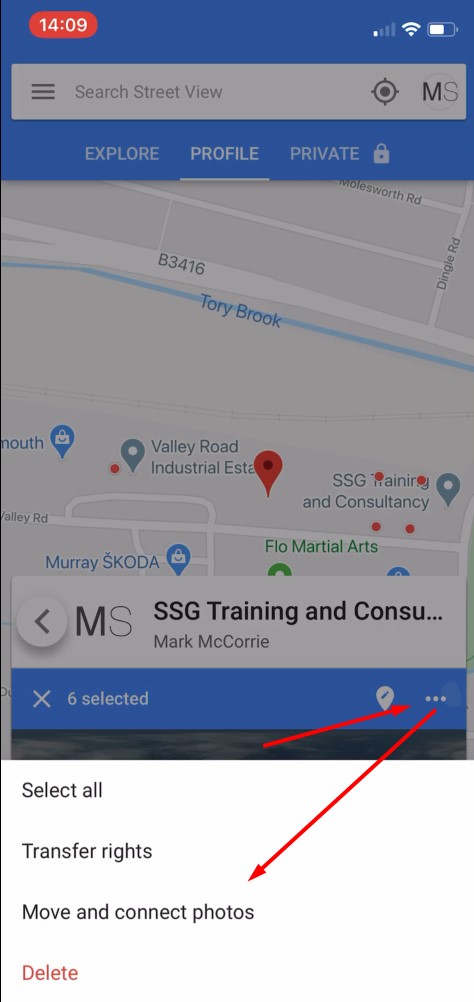
Similar to a virtual tour, you have to link the images together to be able to walk around the images as a 360 tour.
Go back to the toggle, and this time select 'Move and connect photos'. Here you can turn on and off links between images, which Google will suggest for you.
Save your links by clicking the tick in the top right of the page.
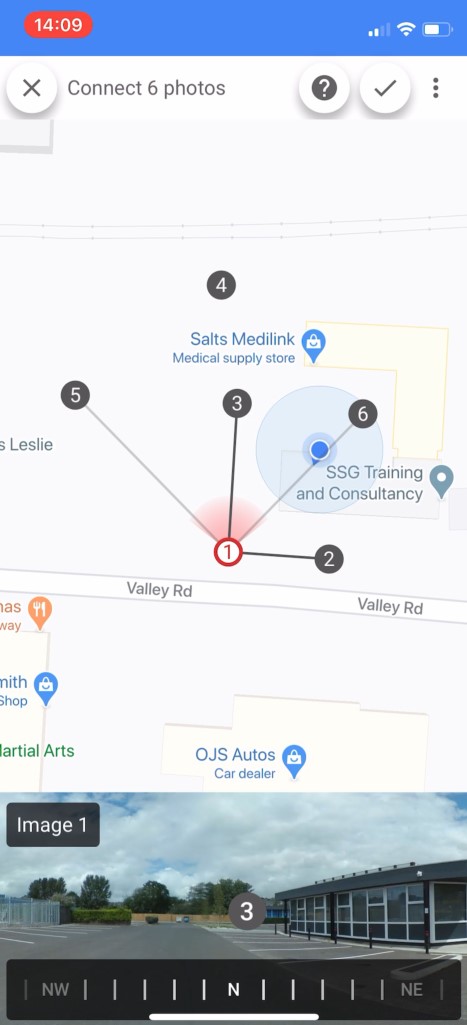
Uploads can take up to 24 hours to be shown on Google street view or maps.

Mark McCorrie
CEO, Made Snappy
Made Snappy is a platform that provides software for Letting and Estate agents to create their own virtual tours
www.madesnappy.co.uk
29th September 2020
Adjusting the brightness on your camera
How to adjust the exposure of your photographs within the MiSphere app
Read More

10th July 2020
Adding a Facebook Pixel to your tours
Add a Facebook Pixel to your virtual tours to target your portal traffic with Facebook Ads
Read More

1st July 2020
Adding your business to Google street view
Your 360 photographs can be added to Google street view.
Read More

12th June 2020
How To Rent Guide updates
We have designed a tool that checks the government website every hour for updates
Read More