 Book demo
 Book demo
6th April 2021
Our new user and branch management functionality has gone live.
User management allows you to give each person in your business their own login and control what they can do on your account, including whether they can change your subscription. Branch management allows you to organise your tours into individual branches, or split lettings and sales in a single branch into different sections.
In this guide we'll look at how to convert your account to get the most of the new functionality.
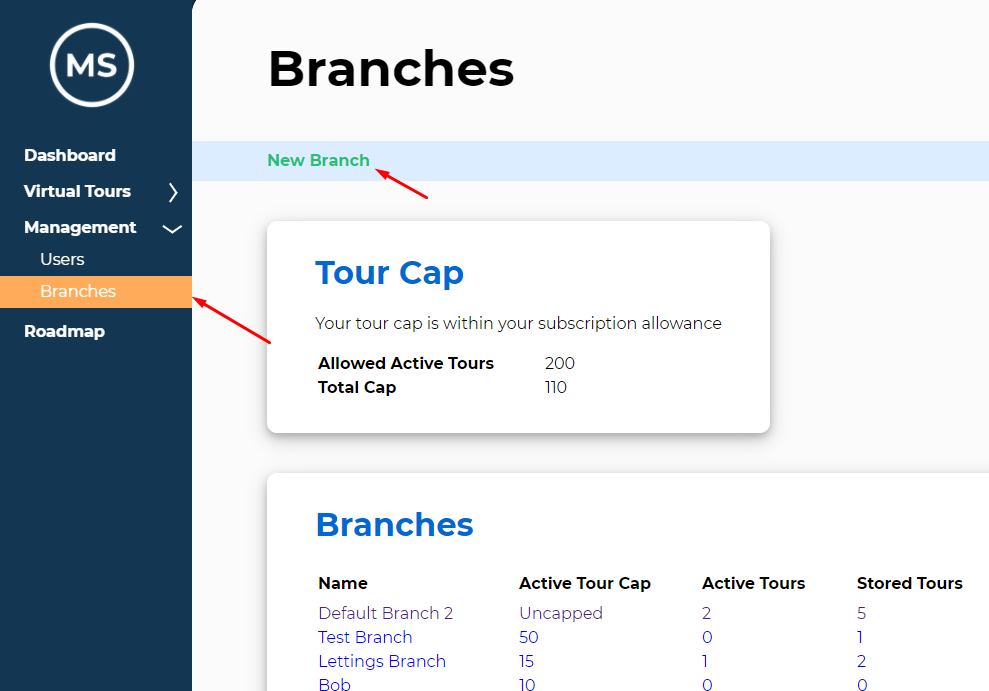
First we need to create new branches. Go to the branches page in the side navigation. You'll find you already have a branch called "Default Branch". We recommend renaming this to one of your existing branches to reduce your workload later.
Click on the "New Branch" button to create a new branch.
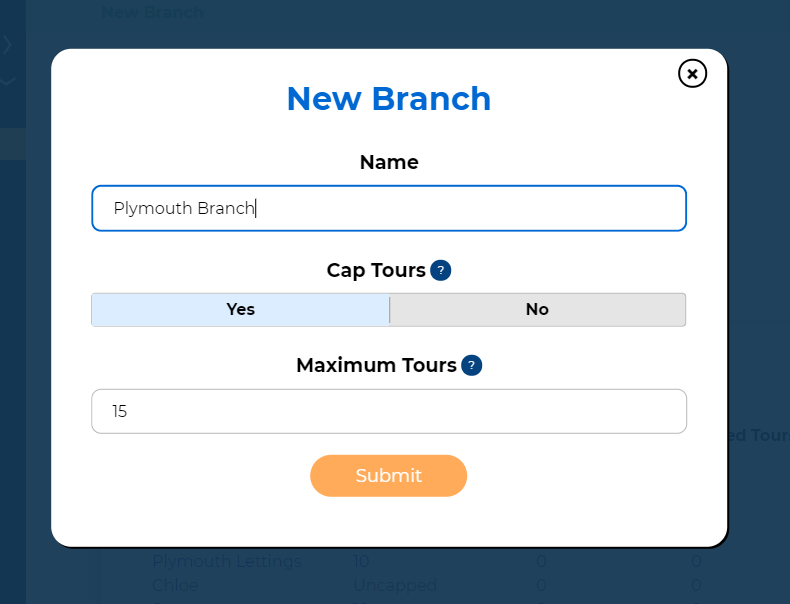
Choose the name for your branch. You can also put a cap on the number of public tours this branch is allowed to prevent them using too much of your subscription.
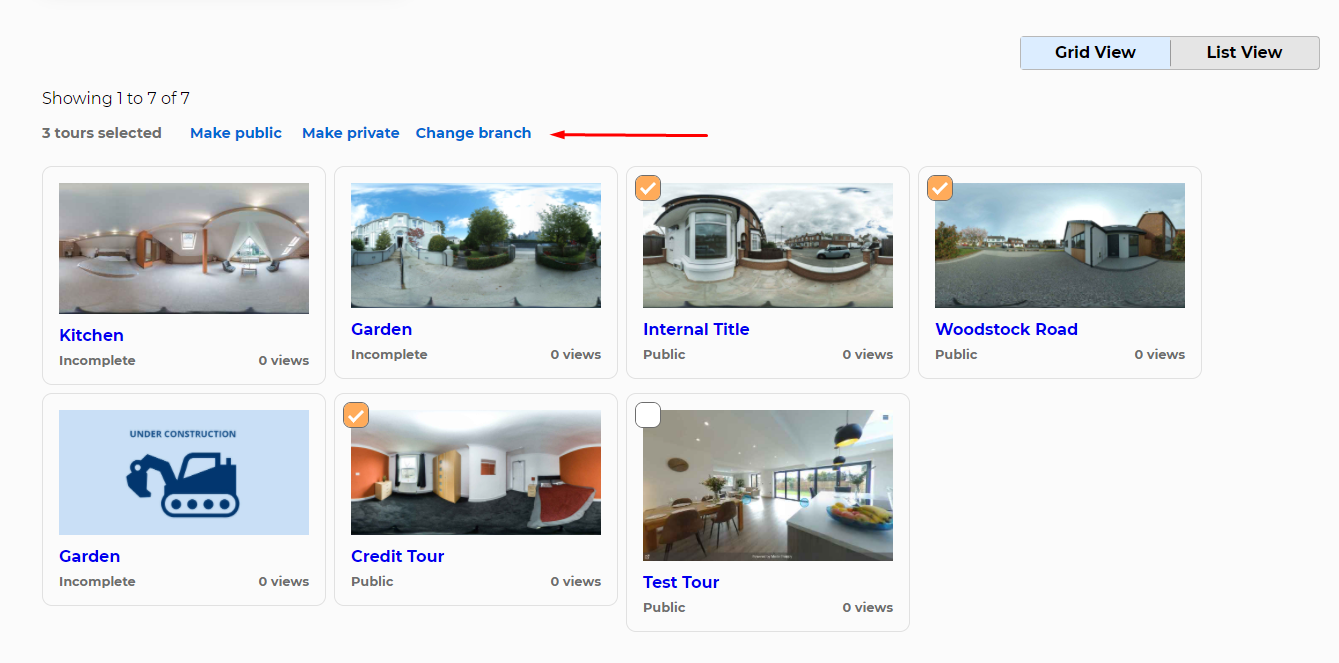
Once you have created your branches, we need to move the tours to the correct branches. Go to the tours page, select a group of tours to move them to a different branch, then click the "Change Branch" button.
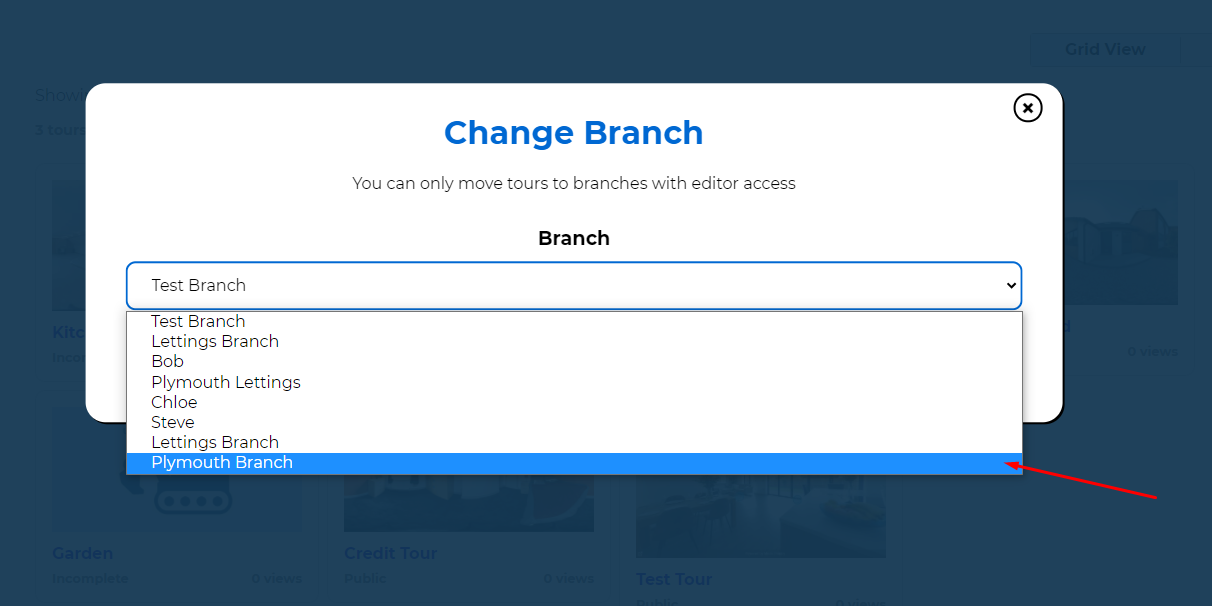
Choose the branch you want to move your tours to, and they will move to the correct branch.
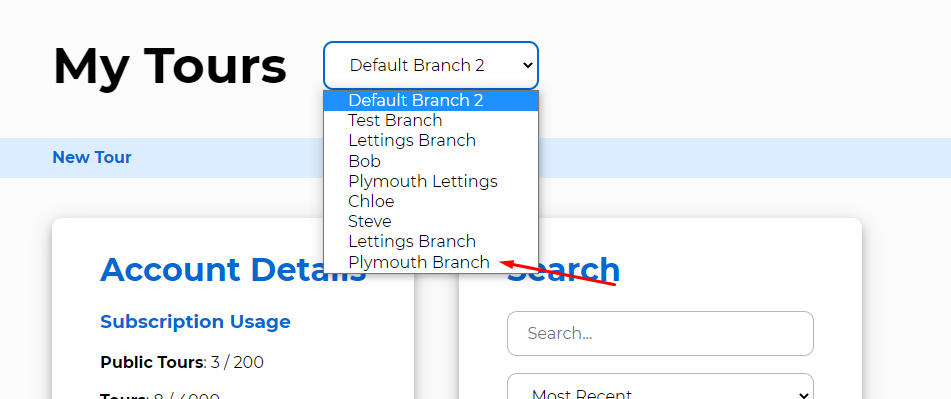
Now your account is ready to go, you can switch between branches at the top of your tours page at any time to view the tours in a specific branch:
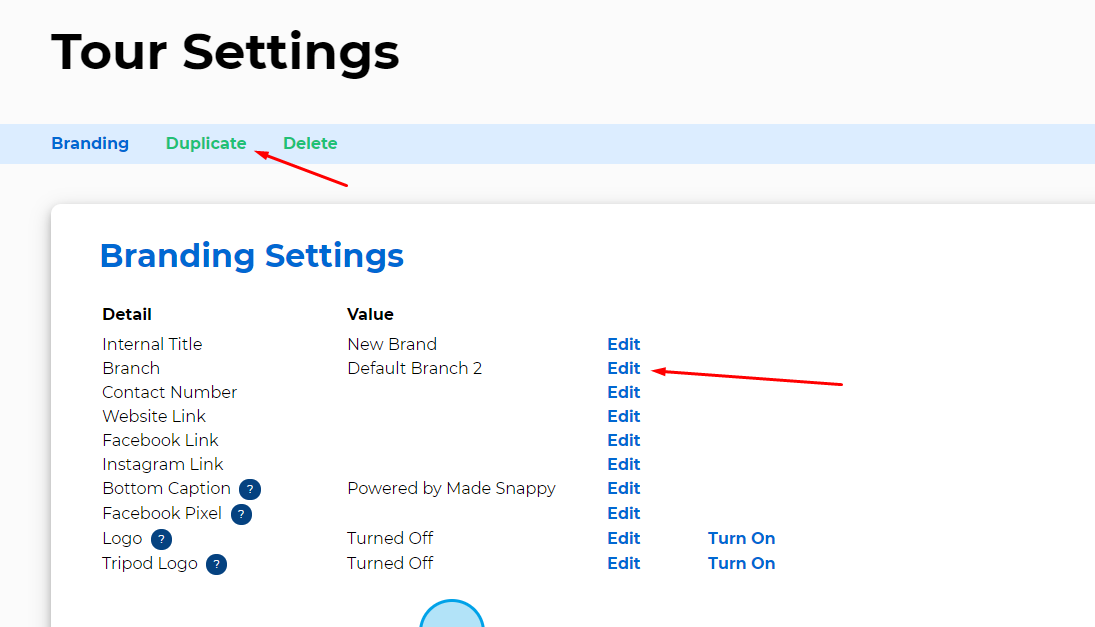
When you move your tours into new branches, you will also need to make sure they have the correct branding on them.
If you have different branding per branches already, you can go into each brand and move it to the correct branch.
If you need to duplicate your branding into different branches, you can click the duplicate button on a brand and create a copy of it in a new branch.
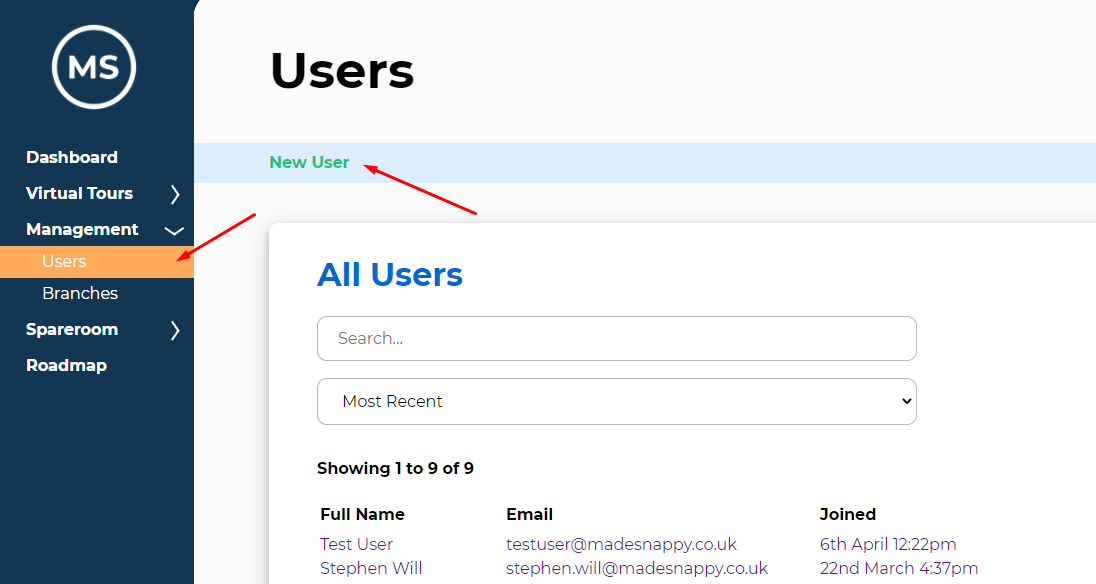
To create accounts for each of your users, go to the Users page, and click on "New User".
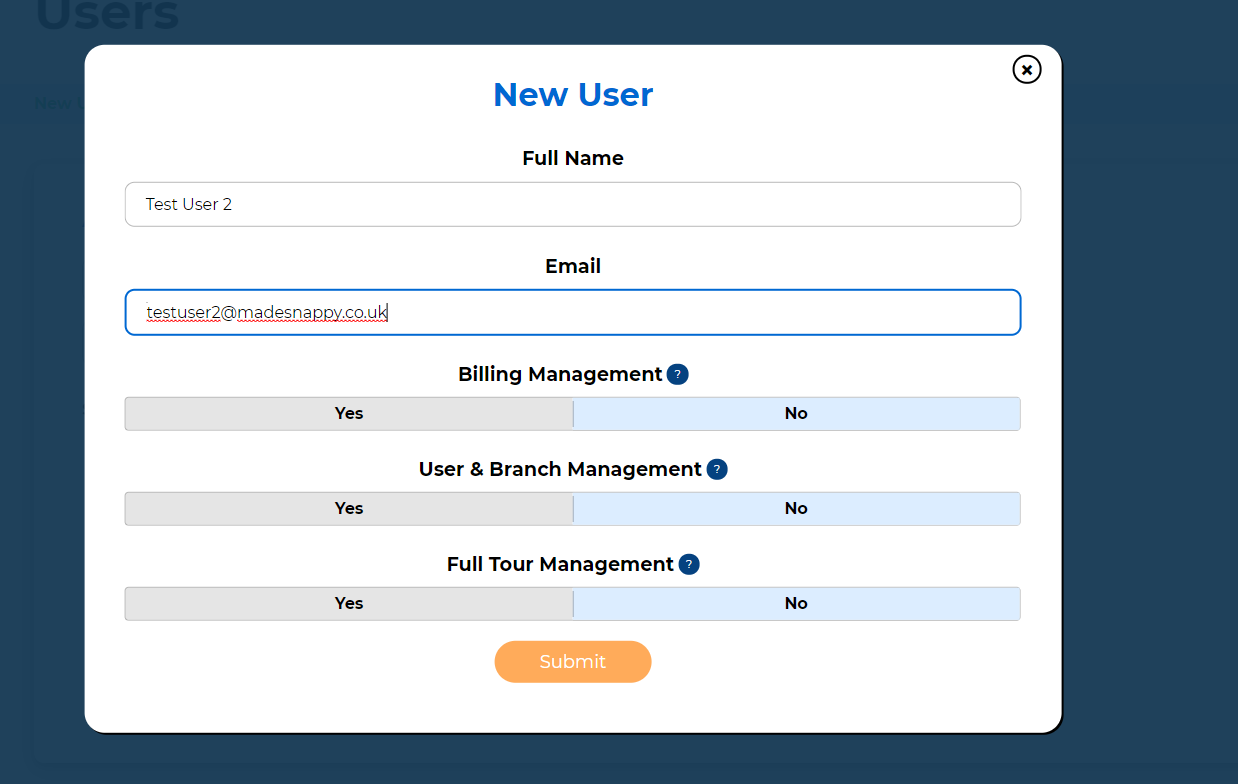
Set a name and email address for the new user. They will be emailed a link to setup their own password.
You have a choice of 3 different permissions. Billing management allows them to modify the subscription and cards on your account. User & branch management allows the users to create new branches and manage users on your account. This also allows them full management of all the tours. Full tour management allows a user to create and edit tours on every branch in your account.
If you want to add users to specific branches, put "No" in all of these permissions.
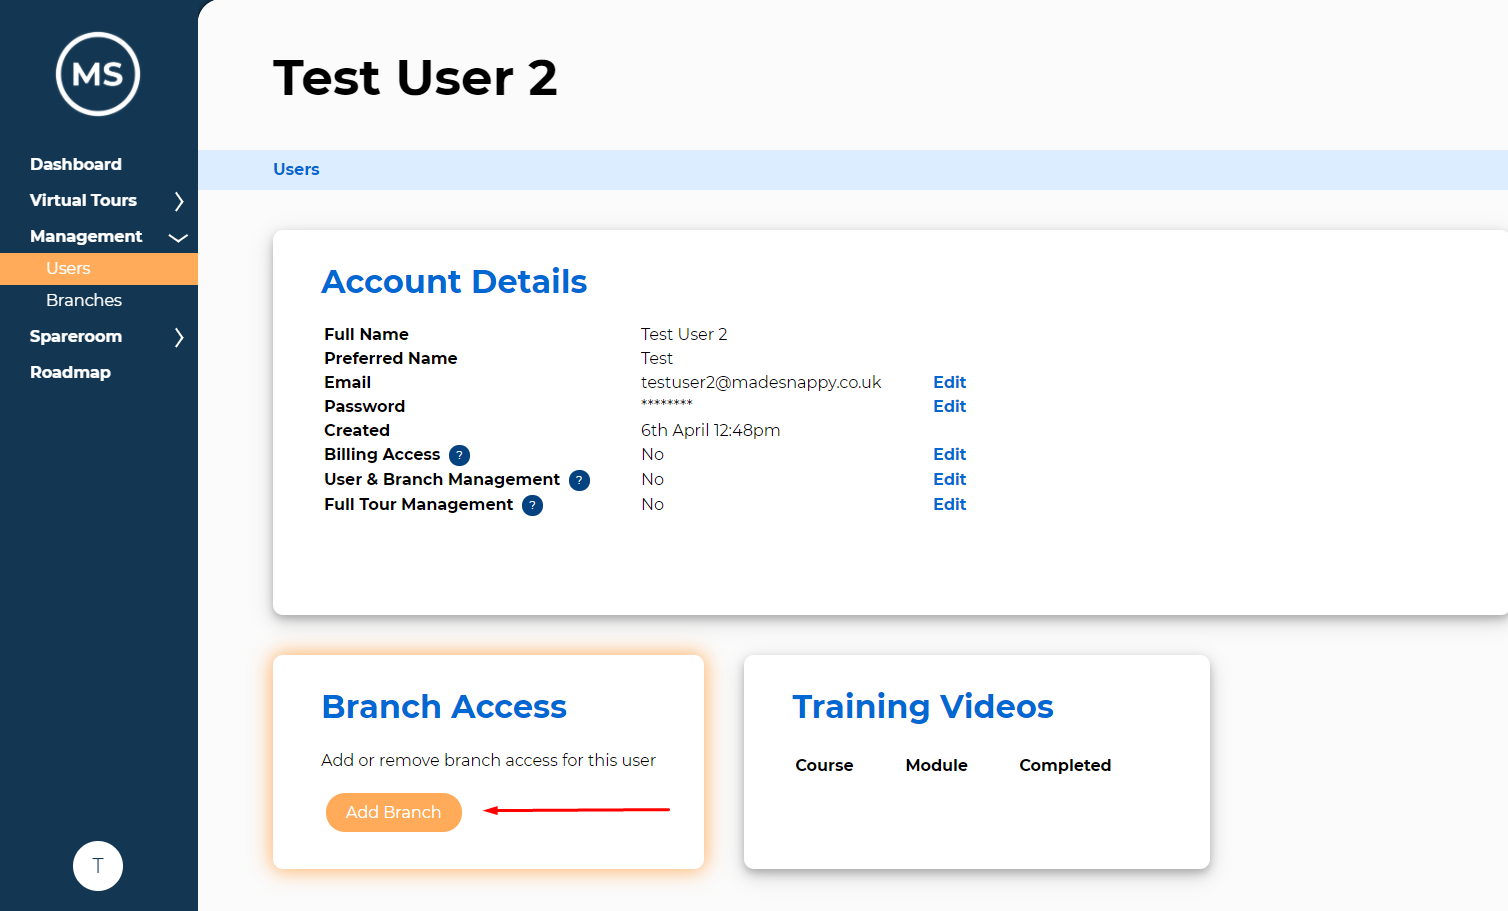
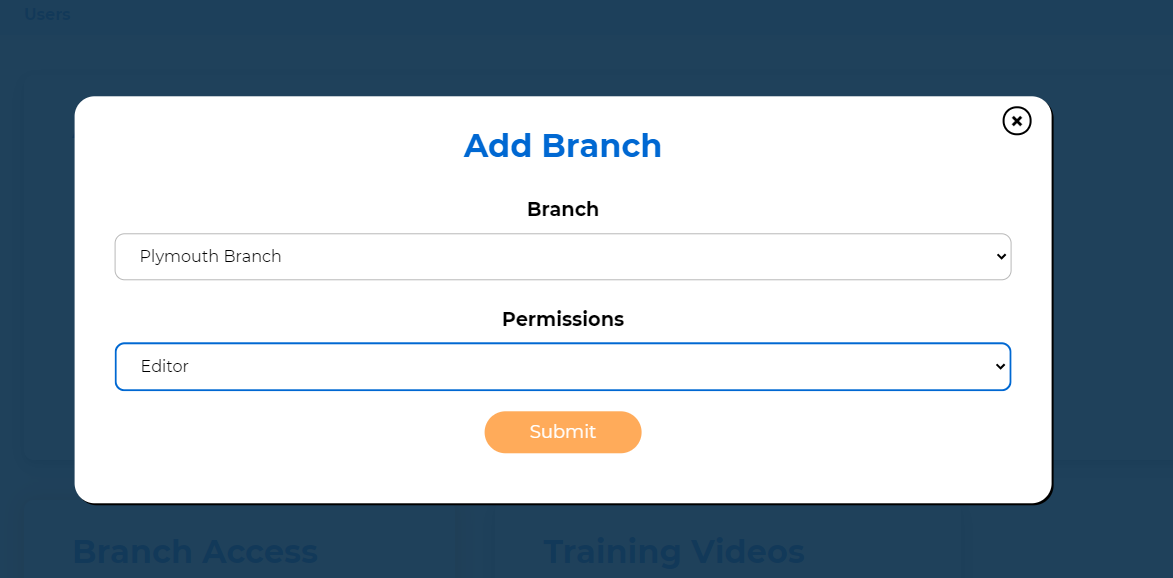
Once you have added a user, if you haven't given them full tour management, you can add them to individual branches.
You can decide whether they are only allowed to view tours (View Only), are allowed to edit tours, or allowed to manage the users on the branch (Admin):

Mark McCorrie
CEO, Made Snappy
Made Snappy is a platform that provides software for Letting and Estate agents to create their own virtual tours
www.madesnappy.co.uk
29th September 2020
Adjusting the brightness on your camera
How to adjust the exposure of your photographs within the MiSphere app
Read More

10th July 2020
Adding a Facebook Pixel to your tours
Add a Facebook Pixel to your virtual tours to target your portal traffic with Facebook Ads
Read More

1st July 2020
Adding your business to Google street view
Your 360 photographs can be added to Google street view.
Read More

12th June 2020
How To Rent Guide updates
We have designed a tool that checks the government website every hour for updates
Read More